Categories
Survival

Survival Weapons Guide: What You Really Need When It All Falls Apart

When the grid goes dark and law is just a memory, you won’t rise or fall by how many tins you’ve stored — you’ll survive because you can protect yourself. Whether it’s defending your family, deterring threats, or putting meat on the fire, the right weapons aren’t about violence — they’re about survival.

This isn’t a fantasy list for action films. These are real, field-tested tools every prepper can rely on — weapons you can carry, maintain, and wield when there’s no one else to call.


The Golden Rule of Survival Weapons

Forget flashy gear and oversized blades. A weapon is only as useful as:

  • Your ability to carry it every day
  • Your skill in using it under pressure
  • Its reliability when everything else fails

Every prepper’s arsenal should prioritise practicality, legality, and adaptability.


The Core Survival Weapons

1. Fixed-Blade Knife (Your Lifeline)

A survival knife isn’t just for defence. It’s your cooking tool, wood splitter, and emergency weapon.

  • Look for: Full-tang, 4–6 inch blade, high-carbon steel.
  • Avoid gimmicks (hollow handles, “Rambo” blades).
  • Practice: Fire starting, shelter building, and quick deployment.

2. Hatchet or Compact Axe

Doubles as a tool and weapon.

  • Ideal for splitting wood and as a last-resort defensive option.
  • Compact enough to carry, heavy enough to hit hard.
  • Keep it shaving-sharp and oiled — dull steel is dangerous.

3. Tactical Flashlight

Not a toy — a 1,000-lumen flashlight can blind a threat, signal for help, or serve as a striking tool.

  • Choose aluminium body and rechargeable batteries.
  • Train to use it in combination with a knife.

4. Pepper Spray (Low-Lethal Deterrent)

When you can’t risk lethal force, pepper spray buys you escape time.

  • Compact, legal (in most regions), and effective.
  • Always test the canister and know your range.

5. Improvised Weapons

When things get truly desperate, almost anything can be a weapon:

  • Heavy torch, trekking pole, or even a sock with a stone can be decisive.
  • Learn improvised striking techniques — your environment is your armoury.

Weapons for Hunting and Food Procurement

Defence is one side of survival — feeding yourself is the other.
Depending on your local laws and skill, consider:

  • Slingshot: Quiet, light, excellent for small game.
  • Bow: Reusable ammo, powerful, and nearly silent.
  • Air Rifle: Legal in many places and perfect for small game.

Firearms are effective, but ammo runs out. Silent, sustainable tools often serve preppers better in the long haul.


Training Over Toys

The best weapon you can carry is competence.

  • Learn basic defensive stances, strikes, and situational awareness.
  • Practise with your tools regularly — stress drills, not just backyard swings.
  • Take a self-defence or bushcraft course if you haven’t yet.

The Gideon Rule

Weapons won’t save you if your mindset is weak. Survival is 80% preparation and awareness, 20% hardware. Carry what you can use, train until it’s instinct, and never forget: every tool you carry should serve at least two purposes.


Quick Checklist: Building Your Survival Weapons Kit

  • Full-tang fixed blade knife (4–6 inch)
  • Compact hatchet or axe
  • 1,000+ lumen tactical flashlight
  • Pepper spray (tested and legal)
  • Slingshot or bow (for hunting)
  • Knowledge of improvised weapon techniques
  • Training: Defensive and bushcraft skills

Conclusion

When the system cracks, there won’t be police on the line or 999 to call. Your skills, tools, and resolve will be the only things standing between you and the chaos. Build your kit, practise with it, and trust nothing but what you can wield.

Categories
Survival

Self‑Defense for Preppers Guide

When the lights go out and the world slips into chaos, the rules change overnight. Police won’t be coming. Neighbours turn desperate. Supplies become targets. Survival isn’t just about food and fire anymore — it’s about defence.

For preppers, self-defense isn’t aggression. It’s survival. Whether you’re sheltering in place or moving through the shadows, you need to be ready to protect your family, your gear, and yourself when the thin veil of order rips away.


Why Preppers Must Master Self‑Defense

When society falters, human threats rise faster than hunger or cold:

  • Looters will target homes and camps.
  • Desperation drives people to violence.
  • You may need to defend while injured, exhausted, or outnumbered.
  • Your supplies — food, water, medicine — will make you a mark.

Being prepared means being capable of repelling threats without hesitation, using skill, strategy, and the right tools.


Layers of Self‑Defense for Preppers

1. Situational Awareness – The First Weapon

The best fight is the one you avoid. Train your instincts:

  • Keep your head up and eyes scanning.
  • Learn to spot unusual movement, sounds, and shadows.
  • Identify exits and cover wherever you are.
  • Avoid becoming predictable — vary routines and routes.

2. Unarmed Self‑Defense

Even the best preppers can be caught without weapons. Learn core techniques:

  • Strikes: Palm strikes, elbow shots, and low kicks are simple and powerful.
  • Escapes: Practice breaking free from grabs and holds.
  • Ground Defence: Learn how to create space and regain footing if knocked down.
  • Focus on disabling and escaping, not street fighting.

3. Improvised & Non-Lethal Weapons

When firearms aren’t available or legal, you can still arm yourself:

  • Tactical flashlight: Blinds and disorients attackers.
  • Walking stick or baton: Doubles as a mobility tool and defensive weapon.
  • Everyday objects: Belt, keys, even a sturdy pen can save your life.
  • Pepper spray (where legal) buys you time to escape.

4. Firearms & Legal Weapons

If you choose firearms, preparation is key:

  • Train extensively — panic and inexperience get people killed.
  • Store ammunition securely but accessibly.
  • Know your local laws and restrictions, even in crisis.
  • Always pair firearms with non-lethal options.

5. Securing Your Shelter

Defence isn’t just about combat — it’s about prevention:

  • Reinforce doors and windows with bars or braces.
  • Set up early warning systems (dogs, tripwires, noise traps).
  • Use lighting to your advantage — darkness hides you, spotlights expose intruders.
  • Never store all supplies in one spot; diversify your cache.

Mental Preparedness – The Deciding Factor

Self-defense isn’t just physical; it’s mental. When fear takes over, skills vanish. Train yourself to:

  • Stay calm and assess before acting.
  • Rehearse scenarios mentally and physically.
  • Accept that hesitation can cost lives — but unnecessary violence can, too.

Gideon’s Survival Self‑Defense Checklist

  • Stay unseen – avoidance beats confrontation.
  • Train unarmed basics – don’t rely solely on gear.
  • Carry layered tools – flashlight, pepper spray, blade, and (if legal) firearm.
  • Reinforce your home or bug-out shelter.
  • Practise under stress – adrenaline changes everything.

Final Word

In a world where systems collapse and desperation spreads, defence becomes survival. You don’t need to be a soldier or a martial arts master — but you must be prepared to fight, evade, and survive. Because when society’s rules burn out, only the prepared stand their ground.

Categories
Survival

Campfire Cooking Guide

The first crackle of flames, the smell of wood smoke, and the sizzle of food over fire — these are the sounds and scents of survival. Campfire cooking isn’t just about rustic charm; it’s about knowing you can feed yourself when modern kitchens vanish and civilisation feels far away.

When the supermarkets close and the grid goes down, knowing how to cook over an open flame is no longer a weekend novelty — it’s a lifeline.


Why Campfire Cooking Matters for Survival

Cooking over a campfire isn’t just romantic; it’s vital:

  • Kills pathogens in wild or stored food.
  • Preserves morale when conditions turn bleak.
  • Keeps predators at bay with smoke and light.
  • Allows you to boil water and purify supplies.
  • Saves fuel when gas or electricity runs out.

Survivalists who can cook over flame don’t just eat — they thrive.


Building the Right Fire for Cooking

1. The Cooking Base

Forget the towering bonfires. You need a bed of hot coals, not raging flames, to cook steadily.

  • Rake embers into a flat, glowing layer for even heat.
  • Feed small sticks around the edges to keep coals alive.

2. The Cooking Structure

  • Tripod: Easy to make with three sturdy branches and rope. Hang pots or kettles over flame.
  • Rock Grill: Flat stones arranged to hold pans or food.
  • Improvised Grate: Carry a folding grill or use green wood (fresh-cut so it won’t burn) to skewer meat.

Essential Campfire Cooking Gear

Every serious prepper carries:

  • Cast iron pan or Dutch oven – unbreakable, distributes heat evenly.
  • Folding grill grate – portable and reliable.
  • Long-handled tongs and gloves – to avoid burns.
  • Metal skewers or green wood sticks – for roasting.
  • Fireproof kettle – for water, tea, or soups.

Pack light, but never skimp on the tools that turn raw food into survival fuel.


Campfire Cooking Techniques

1. Direct Cooking on Coals

Perfect for bread, bannock, foil-wrapped veg, or meat. Lay food directly on the embers for smoky, fast cooking.

2. Skewer & Rotate

Classic for game meat or fish. Skewer and rotate over coals, keeping the food moving to avoid scorching.

3. Dutch Oven Magic

Place coals both under and on top of the Dutch oven. Ideal for stews, soups, or slow-cooked meals that warm the soul.

4. Rock Oven

Stack flat stones around the fire to trap heat. Cook inside this natural oven for even results when wind howls.


Simple Survival Recipes

  • Bannock Bread: Mix flour, water, and a pinch of salt. Wrap around a green stick and cook over coals until golden.
  • Hunter’s Stew: Toss wild meat, root vegetables, and water into a Dutch oven. Slow-cook for hours.
  • Foil-Packet Veg: Potatoes, carrots, or wild greens wrapped in foil, buried in coals.

Safety and Efficiency Tips

  • Clear at least a 2‑metre radius around your fire to avoid accidents.
  • Keep a bucket of water or sand handy for emergencies.
  • Don’t waste wood — build small, hot fires rather than huge infernos.
  • Practise before you need it. Cooking with numb hands and wet wood is no time to learn.

Gideon’s Campfire Checklist

  • Bed of coals, not flames – control your heat.
  • Three cooking methods (grill, skewers, Dutch oven) packed in your kit.
  • Dry tinder and wood stashed to keep the fire alive.
  • Learn to cook with one hand – in case of injury.
  • Always pack seasoning – morale is as vital as calories.

Final Word

Campfire cooking is more than nostalgia; it’s survival. With the right tools, knowledge, and a steady fire, you can turn wild ingredients or stored rations into fuel for your body and your morale. Master the flame now, before you’re forced to cook your first meal under the cold eye of necessity.

Categories
Survival

Emergency Fire Starters Guide

When the grid goes dark and the cold creeps in, one skill separates the survivors from the lost: fire. Without it, you freeze, starve, and lose the will to push through the night. Matches and cheap lighters? They’re a joke when the rain is sideways, your hands are numb, and the wind threatens to strip away your last spark of hope.

That’s why you need emergency fire starters that will work when the world doesn’t. In this guide, we’ll break down the most reliable fire-starting tools, how to use them under pressure, and the tricks seasoned preppers use to make sure the flame never fails.


Why Every Prepper Needs Emergency Fire Starters

Fire is more than warmth — it’s survival. You’ll need it to:

  • Purify water when all filters fail.
  • Cook game or rations safely.
  • Signal rescuers in the wild or urban wastelands.
  • Ward off hypothermia and predators.
  • Keep morale alive when the night stretches on forever.

Modern conveniences fail. A £1 lighter from the corner shop won’t keep you alive in a gale. But the right gear will.


Types of Emergency Fire Starters

1. Ferrocerium Rods (Ferro Rods)

The gold standard. A ferro rod will throw molten sparks at 3,000°C even when soaked.

  • Pros: Lasts for thousands of strikes, waterproof, works in freezing conditions.
  • Cons: Requires dry tinder and practice.
  • Pro Tip: Pair it with cotton balls soaked in petroleum jelly for instant flames.

2. Waterproof Matches

Not your granddad’s matches. These burn like tiny torches.

  • Pros: Wind-resistant, easy to use, compact.
  • Cons: Limited number, need a dry striker.
  • Pro Tip: Store them in a waterproof case with a spare striker pad.

3. Stormproof Lighters

Think butane lighters on steroids. Some double as mini torches.

  • Pros: Instant flame, reusable, reliable if fuelled.
  • Cons: Cold weather can kill fuel pressure. Needs maintenance.
  • Pro Tip: Keep one in your kit and a backup ferro rod in case it dies.

4. Magnesium Fire Starters

A survival classic. You scrape magnesium shavings and ignite them with a spark.

  • Pros: Burns hot (up to 3,000°C), great for damp wood.
  • Cons: Slower to use, needs practice and a knife.
  • Pro Tip: Pre-shave magnesium into a waterproof container for speed.

5. Natural & Improvised Fire Starters

When your gear’s gone, nature steps in.

  • Dryer lint, birch bark, pine resin, and even char cloth can all catch a spark.
  • In wet weather, split wood to find the dry heartwood for kindling.

Building Your Emergency Fire Kit

Your kit shouldn’t rely on just one tool. Pack at least three ignition methods:

  1. A stormproof lighter.
  2. A ferro rod or magnesium starter.
  3. Waterproof matches.

And always carry tinder – natural or pre-made. A simple tin of petroleum jelly-soaked cotton balls can save your life.


How to Use Fire Starters in Harsh Conditions

  • Wind: Build a windbreak from rocks or your pack before striking.
  • Rain: Carry a foldable tarp or poncho to shield your work area.
  • Snow: Elevate your fire on a platform of bark or sticks to stop it from melting into the ground.
  • Freezing hands: Practise one-handed techniques before you need them.

Gideon’s Checklist: Always Be Fire-Ready

  • Carry at least three different fire starters in waterproof pouches.
  • Store redundant tinder (cotton balls, resin, or commercial tabs).
  • Practise with every tool you own — don’t wait until your life depends on it.
  • Rotate lighters and matches to avoid fuel loss or dampness.
  • Never trust a single method; redundancy is survival.

Final Word

When the system collapses — and it will, eventually — fire is life. Don’t gamble on luck or a single Bic lighter. Build a kit that can spit flame in a storm, on a frozen mountainside, or after you’ve been dunked in a river. Emergency fire starters aren’t optional — they’re the line between a cold night and no tomorrow.

Stay warm. Stay alive.

Categories
Survival

How to Start a Fire Guide: Ignite Life When Everything Else Fails

In a survival scenario, fire is life. It warms your body, cooks your food, purifies your water, and signals rescuers—or deters predators. But when your lighter is empty, the matches are wet, and the rain won’t quit, most people freeze, literally.

This guide will teach you how to start a fire anywhere, with or without gear, so you don’t become another name on a frozen headstone.


Why Fire Is the First Tool of Survival

  • Warmth: Hypothermia can kill in hours.
  • Water Safety: Boiling eliminates deadly microbes.
  • Cooking & Morale: Hot food and light keep spirits alive.
  • Signal & Protection: Flames attract rescue—or keep threats at bay.

Fire isn’t just comfort; it’s your most versatile survival weapon.


The Fire Triangle: Heat, Fuel, Oxygen

Every flame needs:

  1. Heat – a spark, friction, or concentrated sunlight.
  2. Fuel – tinder (catches fast), kindling (builds flame), and logs (sustains it).
  3. Oxygen – airflow is life. Suffocate it, and your fire dies.

Miss one, and you’ve got nothing but smoke and frustration.


Modern Fire-Starting Tools

Always carry at least two of these:

  • Ferro Rod (Fire Steel): Throws 3,000°C sparks even when soaked.
  • Stormproof Matches: Burn despite wind and rain.
  • Bic Lighter (Wrapped in Tape): Lightweight and dependable.
  • Magnesium Block: Shavings burn hot enough to ignite damp wood.

Primitive Fire-Starting Methods

1. Bow Drill (Friction Fire)

  • Carve a spindle, fireboard, and bow.
  • Spin until the friction creates a hot ember.
  • Transfer to a tinder bundle and blow gently.
  • Takes practice, but it works when nothing else does.

2. Flint and Steel

  • Strike steel against flint to shower sparks.
  • Catch sparks on char cloth or dry fungus (amadou).
  • A proven method for centuries.

3. Solar Fire (Lens)

  • Use a magnifying glass or clear water-filled bottle.
  • Focus sunlight on dry tinder until it smoulders.
  • Only viable in bright daylight—have a backup.

The Tinder Kit You Must Always Carry

  • Cotton balls soaked in petroleum jelly (burn for 5 minutes).
  • Fatwood (resin-rich pine wood, lights easily).
  • Dry birch bark (ignites even when damp).
  • Waxed jute twine (frays into fluffy, catchable fibres).
  • Store in a waterproof pouch—because wet tinder is useless.

Building the Fire

  1. Create a Base: Lay dry sticks or bark to keep your fire off damp ground.
  2. Tinder First: Build a small nest of easily ignitable material.
  3. Kindling Pyramid: Add small twigs in a teepee or log cabin style.
  4. Gradually Add Fuel: Start with finger-thick sticks, then larger logs.
  5. Maintain Airflow: Don’t smother it—feed it like a living thing.

Survival Fire Hacks

  • Steel Wool + Battery: Touch 9V battery to steel wool for instant ignition.
  • Lip Balm on Tinder: Acts as a slow-burning accelerant.
  • Dryer Lint: Lightweight, burns like a fuse.
  • Feather Sticks: Shave curls into damp wood to help it catch.

Quick Fire Kit Checklist (Always in Your Pack)

  • Ferro rod and striker
  • Waterproof matches
  • Cotton balls with petroleum jelly
  • Fatwood or birch bark
  • Lightweight folding knife
  • Waterproof container or pouch

Final Word

Fire isn’t optional—it’s survival. Learn these techniques now, not when your fingers are too cold to strike a spark. Master fire, and you master the wild. Fail, and the wild will master you.

Categories
Survival

Off-Grid Cabins Guide: How to Build or Find Your Survival Retreat

When the grid flickers and society starts to crumble, four walls and a roof won’t be enough. You’ll need a place that doesn’t rely on outside power, city water, or fragile supply chains—a true off-grid cabin.

This isn’t about rustic holidays. It’s about building or securing a retreat where you can stay fed, warm, and safe while the rest of the world unravels.


Why Off-Grid Cabins Are Survival Essentials

  • Independence from fragile systems – no grid, no bills, no dependence on collapsing infrastructure.
  • Security – remote cabins can be fortified and kept off most people’s radar.
  • Sustainability – harvest your own water, power, and food.
  • Resilience – survive months or years, not just days, when the chaos drags on.

Building or Choosing an Off-Grid Cabin

1. Location Comes First

  • Remote, but reachable – far from cities and highways but close enough for regular access.
  • Near natural resources – fresh water, timber, and wild food sources.
  • Avoid flood zones and wildfire paths.

2. Power Options

  • Solar Panels & Battery Banks – silent, renewable, reliable in most climates.
  • Wood Gasifiers or Small Generators – backups for long, dark winters.
  • Keep a manual power option (wind or hand-crank) for redundancy.

3. Water Systems

  • Rainwater catchment with filtration is a must.
  • Hand-dug wells or natural springs provide a permanent supply.
  • Always have gravity-fed backup in case pumps fail.

4. Heating & Cooking

  • Wood stoves for heat and cooking (fuel is abundant if you’re near timber).
  • Rocket stoves or solar cookers as secondary systems.

5. Security Measures

  • Reinforced doors and shutters.
  • Motion-detecting solar lights.
  • Concealed food and supply caches in case of raids.
  • Ideally, a natural barrier (steep terrain, dense forest) adds protection.

Essential Features Every Off-Grid Cabin Must Have

  • Insulation for all-season use
  • Reliable off-grid power and water
  • Multi-fuel heating and cooking
  • Food storage (root cellar or pantry)
  • Tools for repair and resource gathering
  • Defensive measures (physical and strategic)

Quick Checklist: Prepping Your Off-Grid Cabin

  • Solar, generator, and manual power backup
  • Water catchment and filtration system
  • Stocked pantry with preserved food
  • Wood stove with ample fuel reserves
  • Reinforced doors, shutters, and escape routes
  • Medical supplies and tools for self-reliance

Final Word

An off-grid cabin isn’t just a retreat—it’s your last line of defence when supply chains, cities, and the power grid fail. Build it, secure it, and stock it before you need it. Once the lights go out for good, only the prepared will last.

Categories
Survival

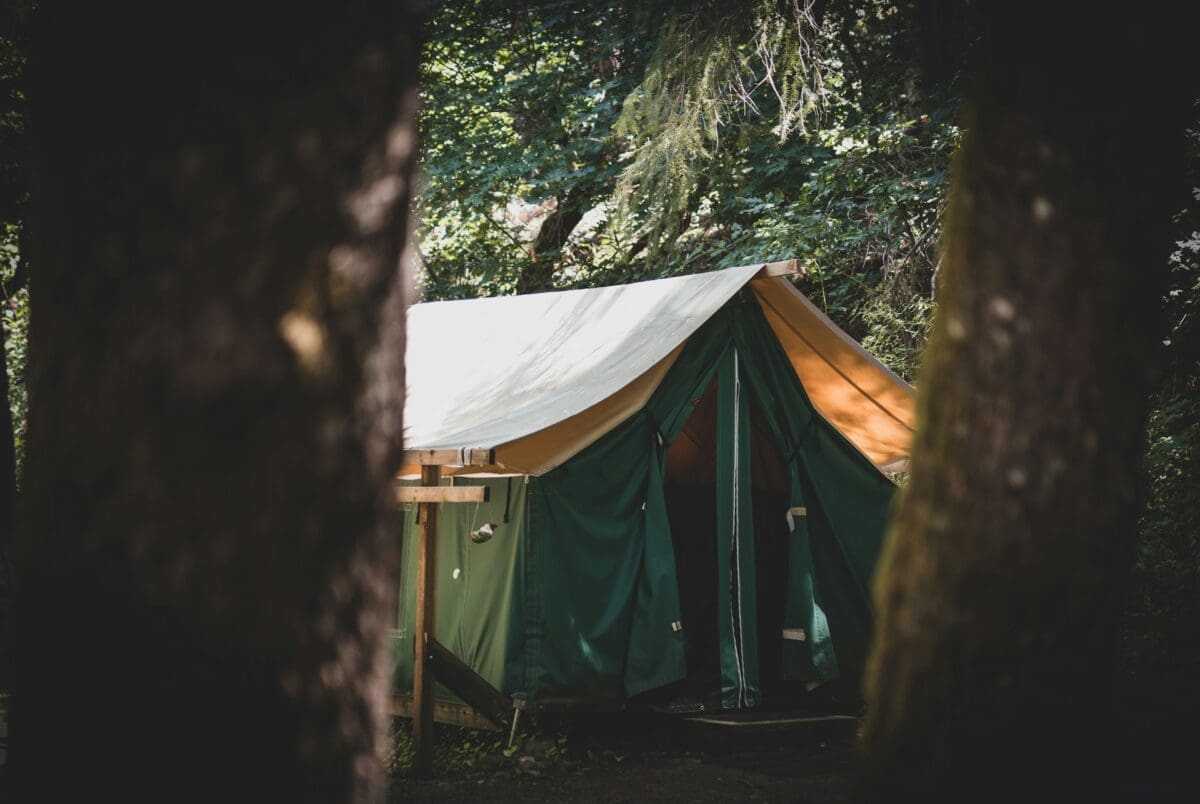
Emergency Tents Guide: The Fastest Shelter When Disaster Strikes

When the storm hits, there’s no time to build walls from branches or dig a snow cave. Sometimes, all you’ve got is what you carried—and that’s where emergency tents become lifesavers.

A good tent isn’t a camping luxury; it’s a barrier between you and the cold, the wet, and the chaos. In survival situations, choosing the right one could be the difference between making it through the night or not making it at all.


Why Emergency Tents Matter More Than You Think

  • Exposure kills fast. Hypothermia and heatstroke can strike in hours.
  • A tent provides instant wind and rain protection when natural shelter isn’t an option.
  • They’re portable, meaning you can move fast without leaving protection behind.
  • Many double as signal tools or heat traps, keeping you visible or warm depending on your needs.

What to Look for in an Emergency Tent

  1. Weight vs Durability
    • Ultralight models are easy to carry but fragile.
    • Heavier expedition tents handle extreme weather but are bulkier.
  2. Setup Speed
    • Instant pop-up or tube-style tents are best when seconds count.
    • Avoid complicated pole systems in crisis scenarios.
  3. Weatherproofing
    • Look for waterproof ratings (3,000mm+ hydrostatic head) and reinforced seams.
    • Snow flaps or wind skirts can save your life in blizzards.
  4. Heat Retention
    • Reflective liners trap body heat.
    • Consider bivvy sacks or thermal layers for sub-zero conditions.
  5. Visibility & Camouflage
    • Bright colours make rescue easier.
    • Neutral greens and browns keep you hidden if discretion is vital.

Types of Emergency Tents Worth Carrying

1. Bivvy Sacks (Ultra-Compact)

  • Weighs almost nothing, fits in a pocket.
  • Provides wind and rain protection for one person.
  • Reflective versions trap body heat, but space is minimal.

2. Tube Tents (Instant Setup)

  • Simple plastic or Mylar tubes—string between two trees for instant cover.
  • Not comfortable, but fast and effective for wind and rain.

3. 4-Season Survival Tents

  • Proper expedition-grade shelters built for snow and storms.
  • Bulkier but crucial if you’re travelling in hostile climates.

4. Pop-Up Shelters

  • Perfect for rapid deployment in moderate weather.
  • Limited durability in storms—always anchor securely.

How to Make Any Tent More Survivable

  • Ground Insulation: Lay pine boughs, blankets, or foam mats to avoid heat loss.
  • Wind Barriers: Use natural cover or build a wall of snow or logs to block gusts.
  • Fire Reflection: Pitch near a safe, reflective fire wall to bounce warmth inside.
  • Double Up: Use a bivvy inside a tent for added heat and redundancy.

Essential Tent Kit Checklist

  • Lightweight emergency tent or bivvy
  • Paracord and stakes (never trust factory kits)
  • Mylar blanket or reflective tarp (adds insulation)
  • Ground mat or inflatable pad
  • Repair tape and extra guy lines

Final Word

When disaster strikes, a solid emergency tent can buy you precious hours—or even save your life outright. It’s not about comfort. It’s about staying dry, warm, and alive when the elements turn hostile and there’s no roof but the one you brought.


Categories
Survival

Building a Survival Shelter Guide: Stay Alive When the World Turns Hostile

When the weather turns brutal and the grid collapses, a roof over your head is the difference between surviving and becoming another statistic. Your first priority isn’t food or even fire—it’s shelter. Without it, you can freeze or overheat in hours.

This isn’t about a fancy log cabin or a Pinterest bushcraft hut. This is about building fast, strong, and simple shelters that will keep you alive when civilisation abandons you.


Why Shelter Comes Before Everything Else

Most people think they’ll last days without food or water. They won’t. Exposure kills faster than hunger.

  • In freezing rain or wind, hypothermia can strike in under an hour.
  • In desert heat, heatstroke can end you before the sun sets.

Your body can’t fight or flee when it’s burning energy to survive the elements. Shelter buys time.


Choosing the Right Shelter Location

Before building anything, location is survival. Look for:

  • High Ground – Avoid valleys where cold air and floodwater collect.
  • Natural Cover – Trees, rock overhangs, or dense foliage offer instant protection.
  • Proximity to Resources – Near water, firewood, and materials, but away from predator paths.
  • Wind Protection – Hills or boulders can shield you from exposure.

Avoid floodplains, avalanche-prone slopes, and insect swarms.


Types of Survival Shelters (You Can Build Anywhere)

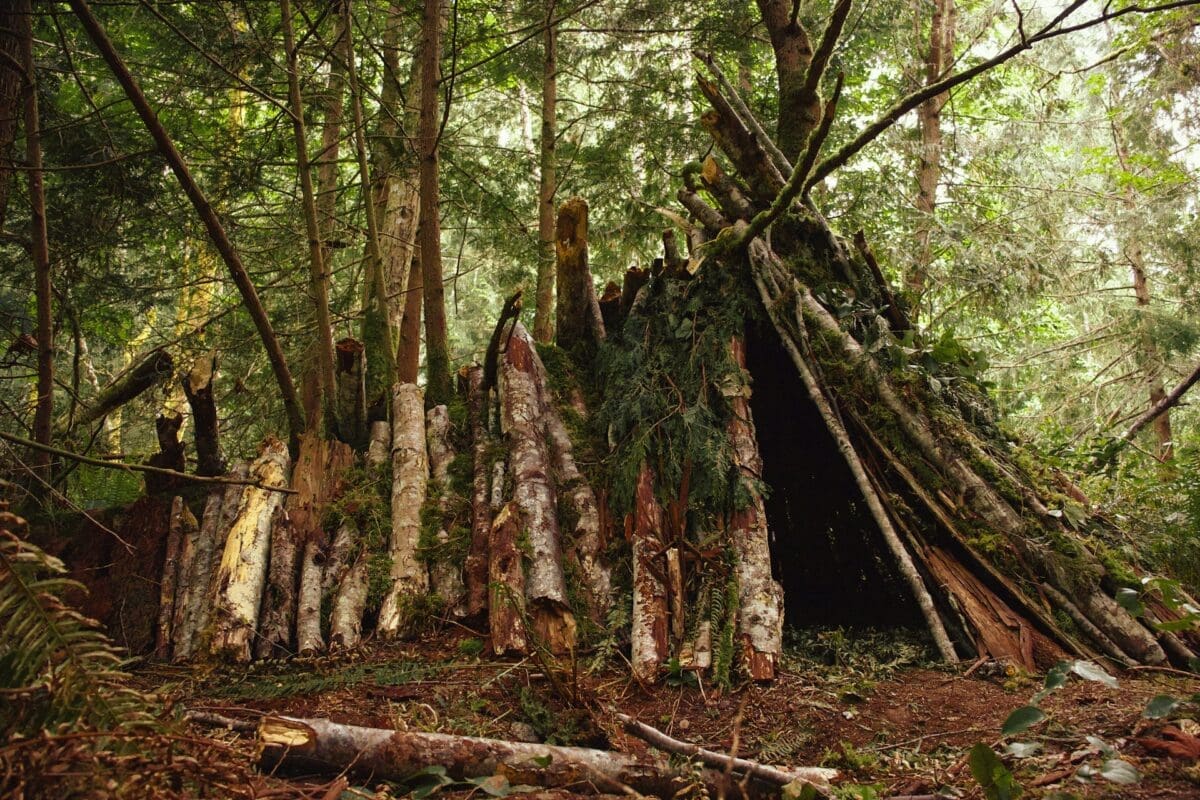
1. Debris Hut (No Tools Needed)

  • Lean a sturdy ridgepole against a fallen tree or rock.
  • Cover it with sticks, then pile on knee-deep leaves, grass, or pine needles for insulation.
  • Crawl inside—body heat will keep it warm even in near-freezing conditions.
  • Survival Time: Up to 1–2 nights without fire.

2. Lean-To Shelter (Quick Wind Break)

  • Drive two posts into the ground or prop against trees.
  • Lean branches against the posts to form a wall angled toward the wind.
  • Add a reflective fire wall opposite your shelter to bounce heat back.

3. Tarp or Poncho Shelter (Instant Roof)

  • A tarp or even a survival blanket can become a lifesaving roof.
  • Tie corners to trees or use stakes for a low, wind-resistant profile.
  • Combine with ground insulation (leaves, branches) to avoid heat loss.

4. Snow Cave or Quinzee (Winter Survival)

  • Pile snow into a mound, let it harden, then hollow it out for a windproof shelter.
  • Block the entrance with a snow wall to trap heat.
  • Beware: Ventilation holes are essential to avoid suffocation.

How to Make Your Shelter Warm and Safe

  1. Insulate the Ground – Use thick layers of leaves, pine boughs, or clothing to keep heat in.
  2. Windproof Your Walls – Overlap natural debris and add mud or clay to seal gaps.
  3. Build a Fire Safely – Place it outside with a reflector wall to project heat without choking you with smoke.
  4. Camouflage (If Needed) – In a hostile environment, cover your shelter with natural materials to stay hidden.
  5. Avoid Traps – Don’t build under dead trees or near unstable cliffs.

Essential Tools (Even Minimalists Should Carry)

  • Tarp or Emergency Blanket – Ultralight, multipurpose shelter base.
  • Fixed Blade Knife or Hatchet – For cutting branches and stakes.
  • 550 Paracord – Strong, compact, and invaluable for shelter frames.
  • Firestarter – Because cold hands make matches useless.
  • Compact Shovel – Doubles for snow caves or digging drainage.

5-Minute Shelter Checklist (Always Keep Handy)

  • Check the weather, wind, and hazards.
  • Find high, dry ground with natural cover.
  • Gather sticks, leaves, and insulating material.
  • Build a wind-facing barrier or roof first, then insulate.
  • Start a fire or secure a heat source before dark.

The Bottom Line

When things fall apart, your shelter isn’t just a roof—it’s the line between life and death. A good survivalist doesn’t wait for rescue; they build, adapt, and endure.

Learn these skills now, practise them before the storm hits, and you won’t just survive—you’ll outlast the panic.

Categories
Survival

Foraging Tips Guide: How to Find Wild Food When Stores Are Empty

When the supermarkets are stripped bare and supply chains collapse, food becomes power. Most people will panic. Some will steal. The rest? They’ll starve—unless they know how to forage.

Foraging isn’t a romantic walk in the woods with a basket; it’s a survival skill that can keep you alive when your stockpiles run dry. Here’s how to do it right—before desperation drives you into danger.


Why Foraging Matters for Survival

Stored food is finite. Even the best stockpile eventually runs out or spoils. When that day comes, your ability to identify, harvest, and prepare wild food will decide whether you endure or perish.

Wild plants, fungi, and even insects can provide critical calories and nutrients. But nature is as deadly as it is generous—you can’t afford mistakes.


The Golden Rules of Foraging

  1. If You Can’t Identify It, Don’t Eat It
    One wrong mouthful can end your survival story fast. Hemlock and water dropwort kill within hours.
  2. Harvest Away From Pollution
    Avoid plants near roadsides, industrial areas, or stagnant water—they absorb toxins that can make you ill.
  3. Only Take What You Need
    Overharvesting destroys local ecosystems and draws unwanted attention to your food source.
  4. Learn to Test Plants Safely
    The Universal Edibility Test (rub, taste, wait) can save your life, but only if you follow every step.
  5. Cook Whenever Possible
    Heat destroys parasites, neutralises some toxins, and makes many plants easier to digest.

Essential Wild Foods to Know

1. Nettles (Urtica dioica)

  • Abundant almost everywhere.
  • High in iron, calcium, and protein.
  • Boil or steam to remove the sting—makes a nutrient-rich soup.

2. Dandelions (Taraxacum officinale)

  • Leaves, roots, and flowers are edible.
  • Bitter but packed with vitamins A, C, and K.
  • Roots can be roasted as a coffee substitute.

3. Acorns (Oak Trees)

  • Calorie-rich but full of tannins (must be leached by soaking).
  • Can be ground into flour for bread or porridge.

4. Wild Berries

  • Blackberries, elderberries, rosehips, and hawthorn berries are safe (avoid bright red unknowns).
  • Always confirm identity—some berries can cause kidney failure.

5. Edible Mushrooms (Only If Expert)

  • Morels, chanterelles, porcini—nutritious and delicious.
  • Deadly lookalikes make this a skill only worth learning properly, never guessing.

6. Wild Garlic (Allium ursinum)

  • Distinct garlicky smell makes it easy to identify.
  • Edible leaves and bulbs add flavour and nutrients.

How to Practise Foraging Before You Need It

You won’t master foraging by reading alone. Start now:

  • Join a Local Foraging Walk: Many guides offer seasonal tours. Learn plants in their natural habitats.
  • Build a Pocket Guide: Laminate a small set of plant ID cards for your region.
  • Practise Cooking With Finds: Learn to prepare safe meals before it’s life or death.
  • Map Reliable Spots: Keep a mental or written record of places with abundant food sources.

Tools You Need for Foraging

  • Small, sharp knife or folding saw
  • Foraging basket or cloth bag (quiet, lightweight)
  • Gloves (for nettles and thorny plants)
  • Field guide or app for plant identification
  • Portable stove or fire kit (for cooking on-site)

Survival Foraging Checklist (Quick Reference)

  • Learn to identify 10 safe wild plants in your region.
  • Carry gloves, a knife, and a guide every time you head out.
  • Avoid polluted areas—factories, roadsides, and stagnant water.
  • Cook whenever possible to kill parasites.
  • Practise before it’s urgent—knowledge beats panic every time.

The Mental Edge

Foraging isn’t just about food. It’s about mindset. When everyone else is queuing for dwindling rations, you’ll be quietly gathering calories from the land, staying unseen and self-reliant.

But make no mistake—this isn’t a hobby. This is survival. Learn now, or starve later.

Categories
Survival

Emergency Rations Guide: How to Stockpile Food Before It’s Too Late

When the grid goes dark and the shelves are stripped bare, food will become the first thing people fight over. Those who planned ahead will eat. Those who didn’t will starve—or worse. In this guide, I’ll show you how to build a reliable stockpile of emergency rations that can keep you and your family alive when modern supply chains collapse.

This isn’t about grabbing a few tins of beans and hoping for the best. It’s about building a calculated, sustainable reserve of calories, nutrients, and morale-boosters—because survival isn’t just about eating; it’s about staying human when everything else falls apart.


Why Emergency Rations Matter

Most households have less than three days of food. Supermarkets carry only enough stock to last 48 hours once panic buying begins. A fuel strike, cyber-attack, or mass power outage could empty shelves faster than you can blink.

Prepping isn’t paranoia; it’s insurance. You wouldn’t drive without a spare tyre—so why risk your life without a spare pantry?


What Makes a Good Emergency Ration?

The perfect emergency ration is:

  • Long-Lasting – Minimum 12 months shelf life (ideally 5–25 years with proper packaging).
  • Calorie-Dense – 2,000+ calories per day per adult.
  • Easy to Store – Compact, lightweight, no refrigeration.
  • Quick to Prepare – Little or no cooking required, especially when fuel is scarce.
  • Balanced – Provides fats, proteins, carbs, and micronutrients to avoid fatigue or malnutrition.

If it can survive rough handling, temperature swings, and a lack of utilities, it earns a place in your stash.


The Core Emergency Ration Foods

Here’s what every serious prepper should stockpile first:

1. Rice and Pasta (Base Calories)

  • White rice stores for decades if sealed with oxygen absorbers.
  • Pasta lasts 5–10 years in airtight containers.
  • Pair with dried beans or lentils for complete proteins.

2. Canned Meats and Fish (Protein & Fat)

  • Tuna, sardines, spam, chicken, and corned beef are all high in energy.
  • Avoid relying solely on tins; rotate stock to prevent spoilage.
  • Cans can be eaten cold—vital if cooking isn’t possible.

3. Beans and Lentils (Plant Protein & Fibre)

  • Dried beans can last 10+ years when stored properly.
  • Canned beans are a quick, ready-to-eat fallback.
  • Soaking and cooking times need planning, so keep both types.

4. Hardtack and Survival Bars (Compact Energy)

  • Old-school sailors lived on hardtack for a reason—it lasts nearly forever.
  • Commercial survival bars (e.g., Datrex, SOS, or Millennium) pack 2,400–3,600 calories per brick and withstand extreme conditions.

5. Honey and Sugar (Infinite Shelf Life)

  • Pure honey never spoils. It’s a natural preservative, energy source, and wound treatment.
  • Sugar fuels energy and morale (don’t underestimate comfort foods).

6. Powdered Milk & Protein Powders

  • Essential for children, elderly, and anyone needing easy-to-digest nutrition.
  • Store in Mylar bags with oxygen absorbers to prevent clumping.

7. Salt & Seasonings

  • Vital for preserving meat and boosting morale when bland rations become unbearable.

Building a Survival Food System (Not Just a Stash)

Your food prep isn’t just a pile of tins—it’s a system designed for survival:

  1. Short-Term (0–2 weeks): Easy-to-eat foods (cans, bars, snacks).
  2. Medium-Term (2 weeks–3 months): Bulk staples (rice, pasta, flour, beans).
  3. Long-Term (3+ months): Freeze-dried meals, Mylar-packed staples, preserved meats, and grains.

Cycle through your stockpile by using and replacing items before they expire—known as the “FIFO” (First In, First Out) method.


How to Store Emergency Rations Properly

Even the best stockpile is useless if it spoils. Follow these rules:

  • Cool, Dry, Dark: Keep food below 21°C, away from sunlight and moisture.
  • Airtight Packaging: Mylar bags with oxygen absorbers extend life dramatically.
  • Pest-Proof Containers: Rodents and insects will chew through plastic. Use food-grade buckets.
  • Off the Floor: Store on pallets or shelves to avoid flooding and contamination.
  • Inventory Tracking: Mark dates clearly and rotate supplies.

Checklist: Your 30-Day Emergency Ration Starter Pack (Per Person)

  • 20kg white rice (sealed)
  • 10kg pasta
  • 5kg dried beans or lentils
  • 30 cans of mixed meat and fish
  • 15 survival bars (2,400 calories each)
  • 3kg sugar and 1kg salt
  • 2kg powdered milk
  • 2 litres honey
  • Essential spices and vitamins

This base kit provides roughly 2,200 calories per day per adult for a full month.


Don’t Forget Morale Foods

Survival isn’t just about calories—it’s about willpower. Coffee, tea, chocolate, and spices can keep spirits up when the world feels grim. A few luxuries can mean the difference between despair and determination.


Final Word

Civilisation feels solid—until it isn’t. Storms, cyber-attacks, pandemics, or political unrest can flip the switch overnight. If you haven’t built a proper emergency rations system, you’re gambling with your life.

Start today. Stockpile. Rotate. And remember—when the shelves go empty, the prepared don’t panic.